


Tools Needed:
-
– Exacto® Knife, Utility Knife or other Sharp Implement
-
– Scissors
-
– Masking Tape (optional)
Inside The Box:
-
– SpeakerHeads Cone Assembly
-
– Foam Center Cap
-
– 2 Centering Guides/Tracing Templates
-
– 2 Alcohol Prep Pads
-
– Instruction Sheets for Installation
Instructions:
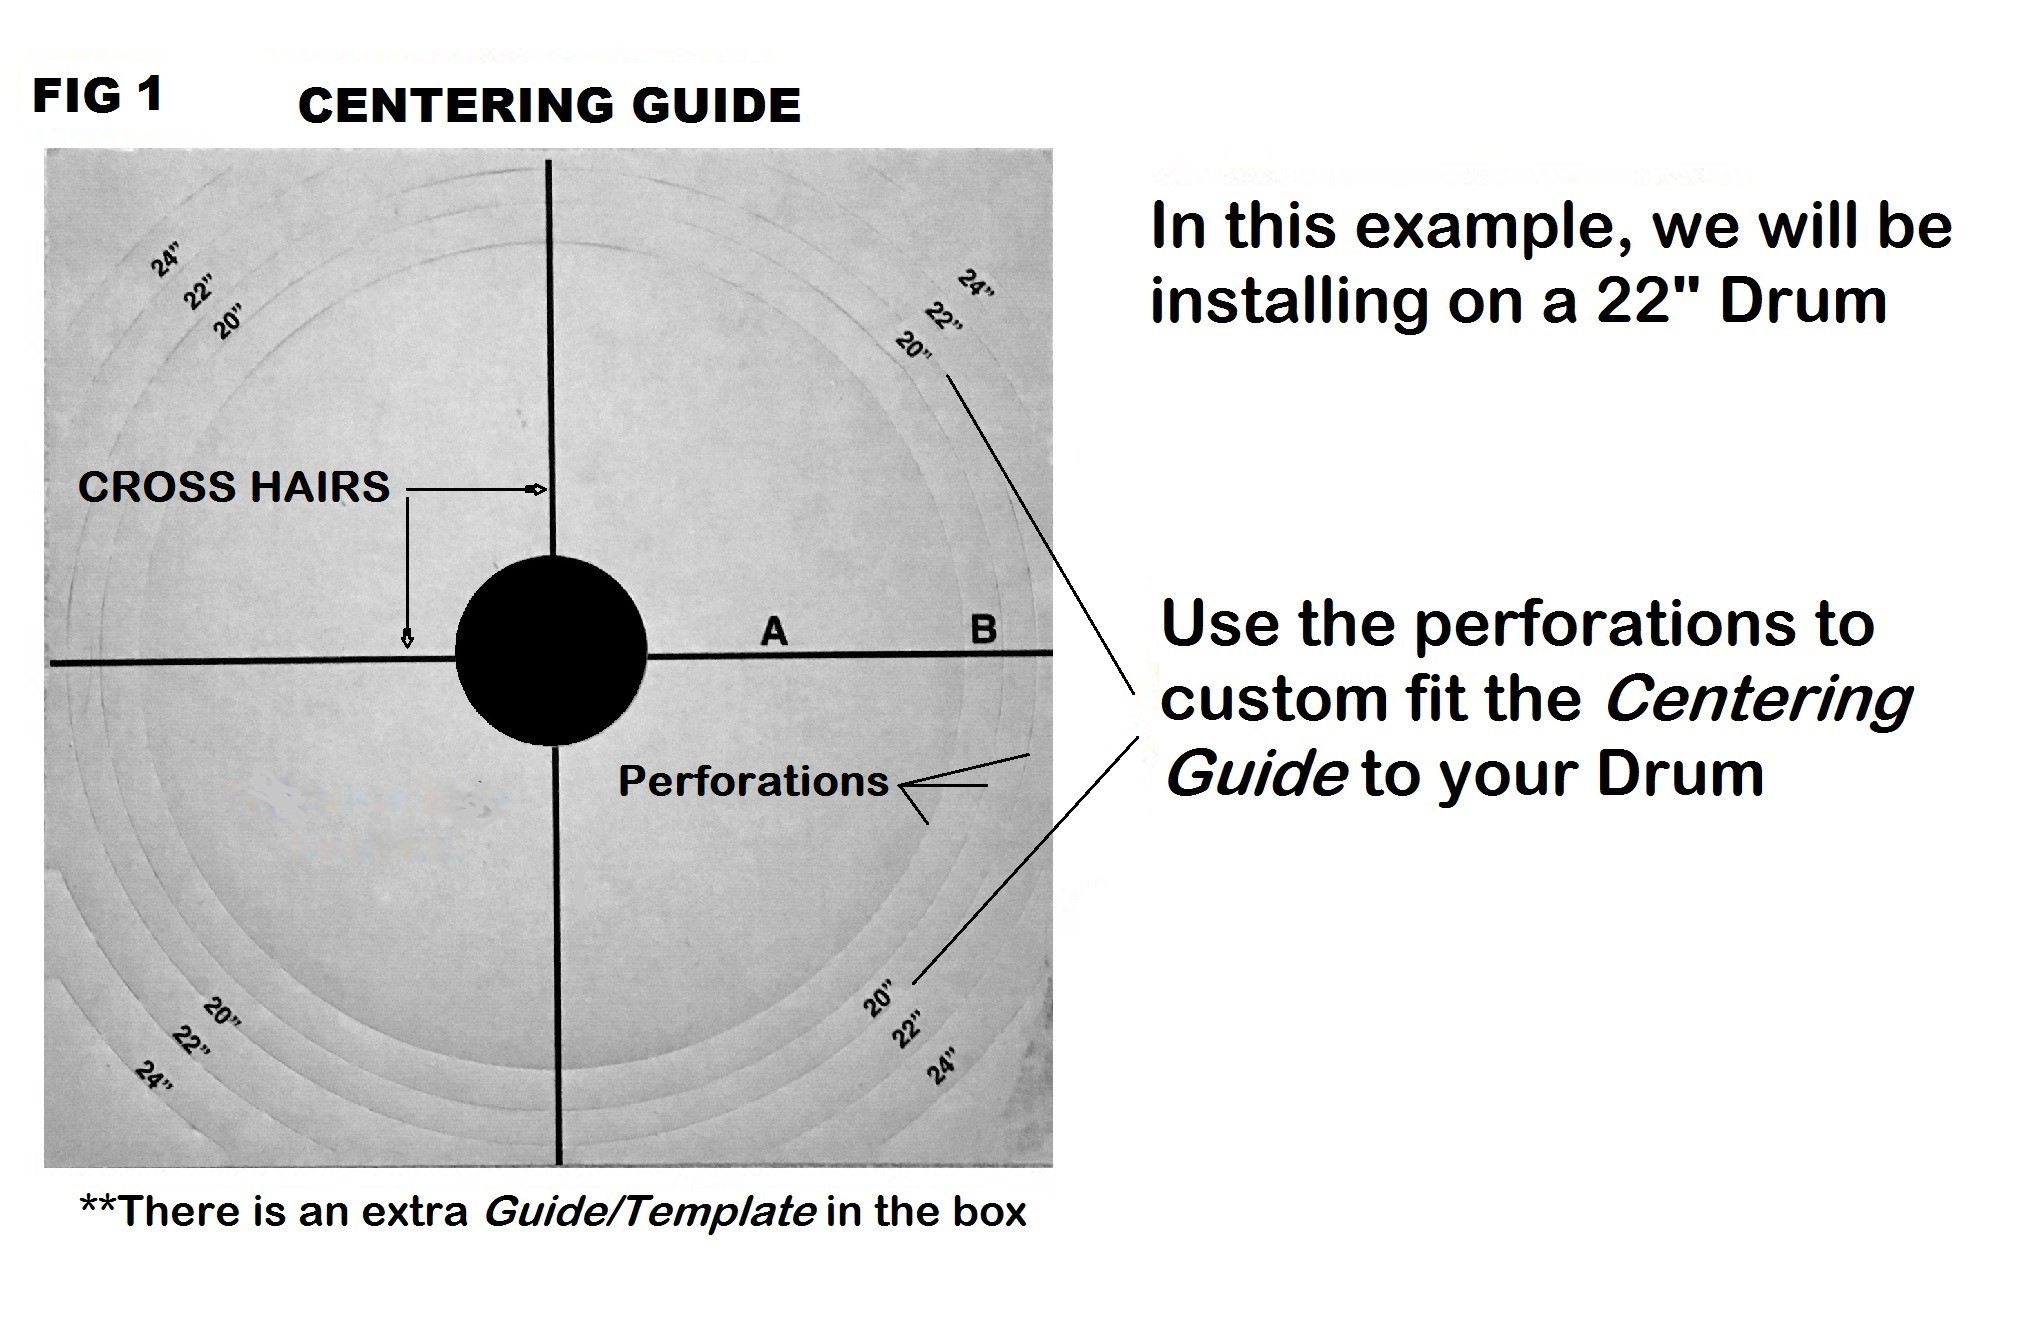
STEP 1 – Set the drum on a flat surface with the resonant side facing up. Loosen the head slightly, but keep it free from any ripples. Take one of the Centering Guides** (Fig 1.) and using scissors, remove the inner section. Then, modify it to fit your particular Drum (20″-24″) by carefully removing the appropriate perforated sections with your scissors. Place the Centering Guide on the drum head. It should fit snugly against the inside of the hoop. You can also use masking tape to secure it.. For 26″ drums, use the whole Centering Guide – Center it on the drum and secure the corners with masking tape.
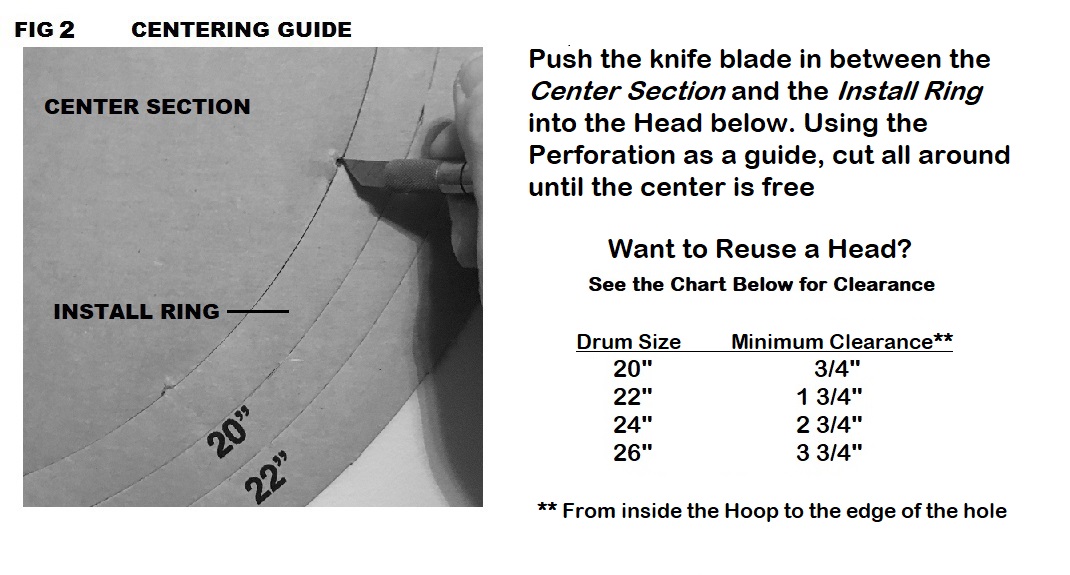
STEP 2 – Leaving the Centering Guide on the Drum, Push the Knife Blade through the Perforation and into the Head. Guided by the Perforation, Cut all around the Head (Fig 2.)
STEP 3 – If needed use the included Alcohol Prep Pads to clean the edge of the head before mounting the assembly CAUTION: THE MYLAR EDGE IS SHARP – USE CARE WHEN CLEANING!
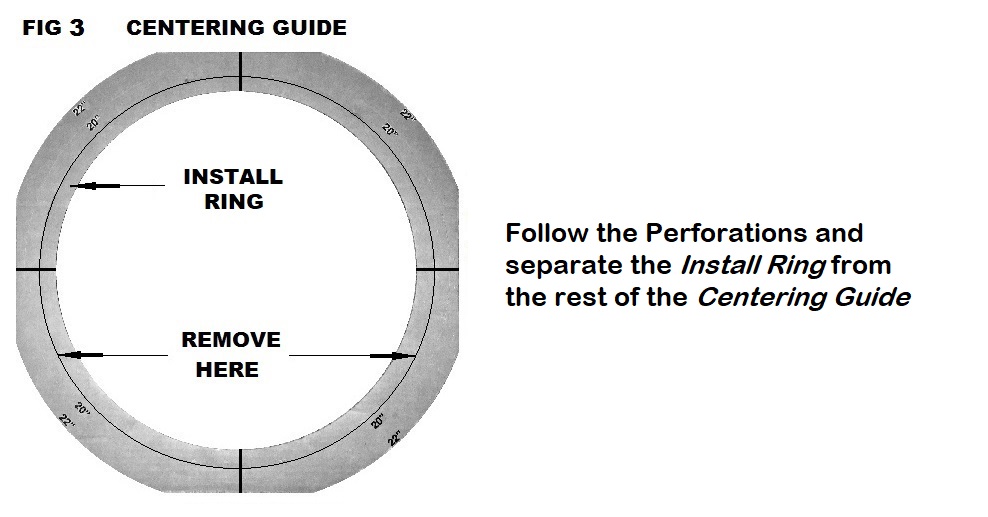
STEP 4 – Using scissors, follow the perforations to remove the Tracing Template from the Centering Guide ( Fig 3.)
STEP 5 – Place the Centering Guide back onto the drum and test fit the assembly. Use the Crosshairs to align the Top and Bottom of the Drum. Pickup the cone assembly. Put one hand through the front of the cone and hold the back of the opening. (Fig 4. ) With the other hand, align the Notches in the Surround Edge with the Crosshairs on the edge of the Centering Guide. Lower the cone down – it should fit completely inside the Centering Guide. and lay flat on the head. If not, trim the edge again until it does.
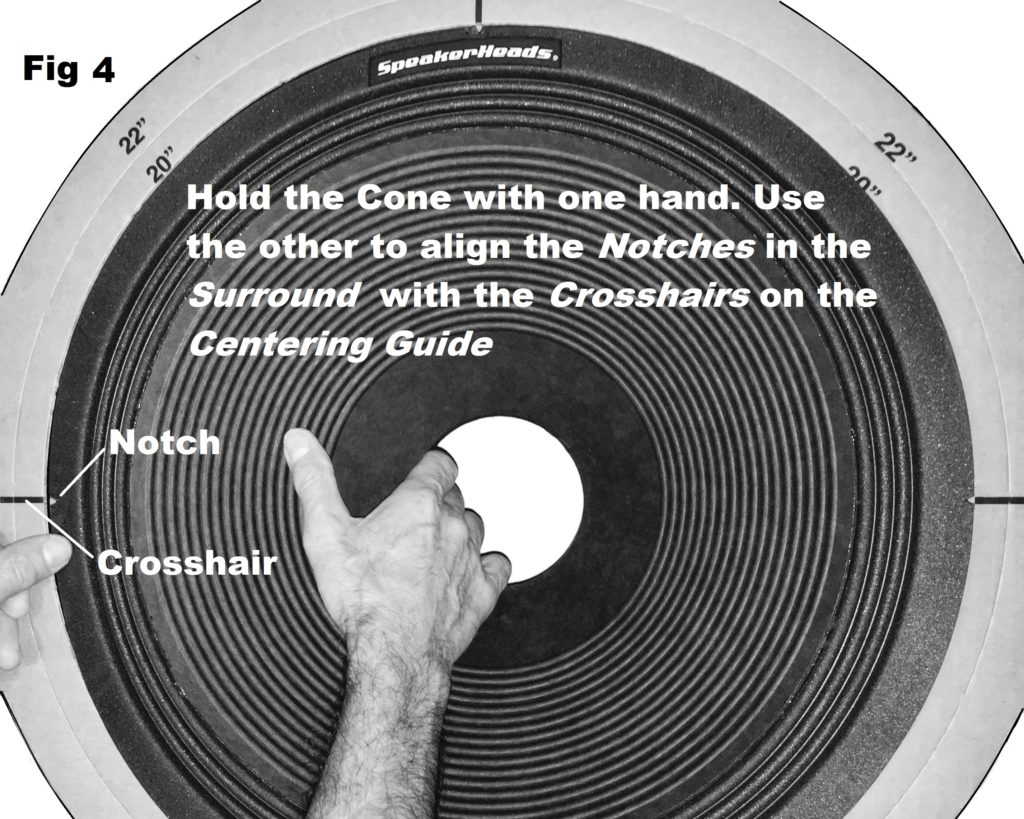
STEP 6 – To install, remove the Peel & Stick backing from the cone and holding it as before, (Fig 4.) realign the Crosshairs and Notches. Press lightly to tack the assembly in place. Lower the cone down until it again sits flat on the head. Using your fingers, press in a continuous motion all around the Surround Edge to remove any air bubbles. Remove the Guide.
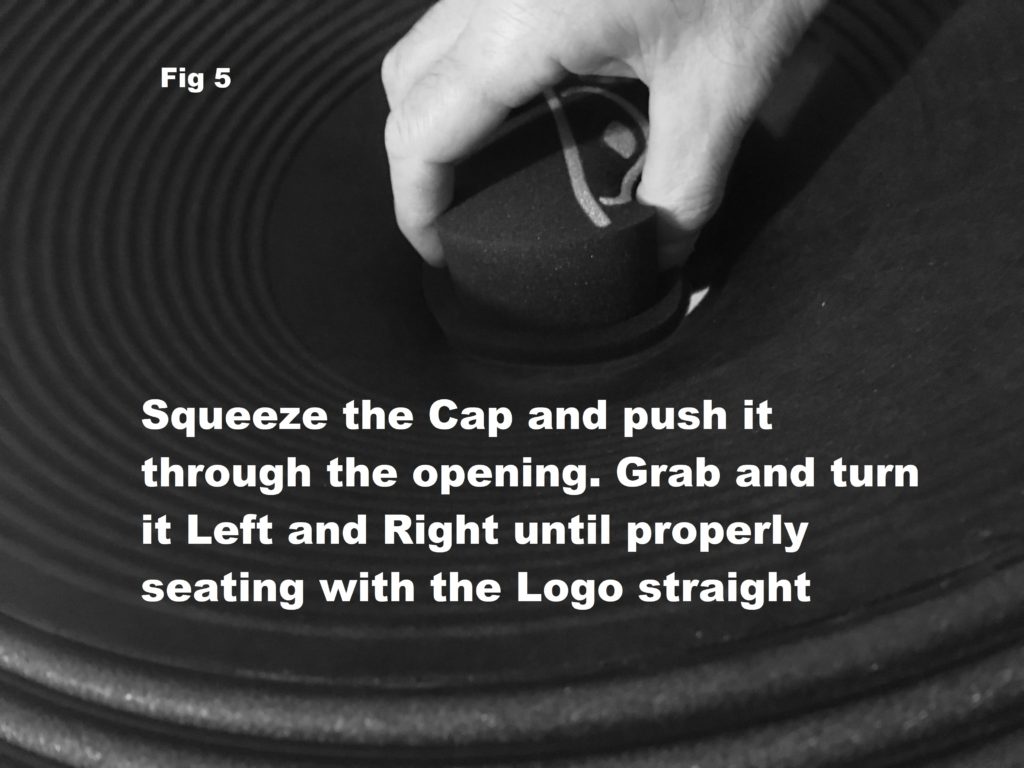
STEP 7 – Take the Center Cap, squeeze it and push it through the cone opening (Fig 5.) Grab and turn the Cap to the left and right until it seats completely and the logo is straight. Re-tighten the head to the desired tension. Then, re apply pressure again to the outer edge one more time.
*** If using a Coated Head, we recommend removing it after installation. Place it Cone Up on a flat surface and apply pressure all around the edge to ensure maximum hold
Rather Watch a Video? Go to: https://www.speakerheads.com/resources/speakerheads-installation/